Part 0
I decided to use a Debian VM to follow the course. It’s been quite a while since
I made these notes and I was still using the deprecated docker-compose. All
the relevant and up-to-date materials can be found
here.
Part 1
What is DevOps
DevOps is a set of practices that combines software development (Dev) and IT operations (Ops). It aims to shorten the systems development life cycle and provide continuous delivery with high software quality. DevOps is complementary with Agile software development; several DevOps aspects came from Agile methodology. (Wikipedia)
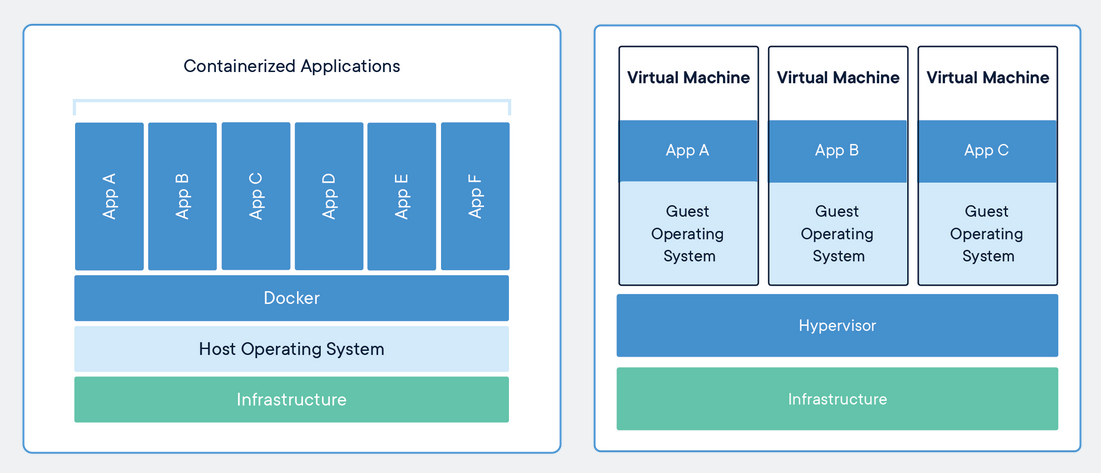
Why Docker?
-
it solves the problem of “runs on my machine” by bundling applications and their dependencies into an image that runs on every machine that can run Docker.
-
How is that different from a virtual machine? The following graphical comparison by Docker shows the difference:
What’s an Image?
A file that is built by another instructional file called “Dockerfile”. The image cannot be changed, you can only “create a new layer to it”
What’s a Container?
Containers are instances of an image. Think of the Dockerfile as your shopping list, and of the image as the ingredients you end up buying. The container is the meal you get at the end if everything worked out.
CLI Basics
| Docker commands | Description |
|---|---|
images | list all images |
run <img> | run an image |
run -d <img> | run image in detached mode |
run --name <name> <img> | run image with name for easy reference |
run --rm <name> <img> | run image and remove container after exit |
rm <id1> <id2> | remove container “id1…” and “id2…” |
rmi <img> | remove image called “img-name” |
container ls | list running containers |
container ls -a | list all containers |
container prune | remove all stopped containers |
pull <img> | pull image called “img” from a docker hub |
exec <id> | execute command in container |
exec -it <id> <cmd> | start interactive session in tty in container |
search | search the registry |
pause | pause container |
unpause | unpause container |
logs -f <name> | follow the output of logs from terminal |
start <name> | start container |
stop <name> | stop container |
kill <name> | kill container if it does not stop |
attach <name> | attach to container from terminal |
attach --sig-proxy=false <name> | attach to container and make sure it cannot be stopped |
history <img> | show which operations have taken place in an image and how they affected the size |
Exercise 1.5
The first non-trivial exercise. I solved it by first running
docker run
    -it \
    --name 1.5 \
    ubuntu:16.04 \
    sh -c 'echo "Input website:"; read website; echo "Searching.."; sleep 1; curl http://$website;'
This then prompts me for a website. But I know that curl is not installed
within the container, so I run
docker exec \
    -it 1.5 \
    bash
in order to install curl. then return to the first terminal and type in a
website. It works as expected.
Working with Dockerfiles
Exercise 1.6
FROM devopsdockeruh/overwrite_cmd_exercise
CMD ["--clock"]
docker build -t docker-clock ex1_7
docker run -it --rm docker-clockExercise 1.7
FROM ubuntu:16.04

RUN apt update && apt install -y curl

WORKDIR /scripts
COPY curl.sh .
RUN chmod +x ./curl.sh

CMD ["./curl.sh"]
Exercise 1.8
touch ex1_18/logs.txt
docker run --rm -v (pwd)/logs.txt:/usr/app/logs.txt devopsdockeruh/first_volume_exercise
Exercise 1.9
Run
docker run --rm -p 5000:80 devopsdockeruh/ports_exercisewhich then allows me to visit my Debian’s VM IP at port 5000:
Transclude of _20201112_161656screenshot.png"
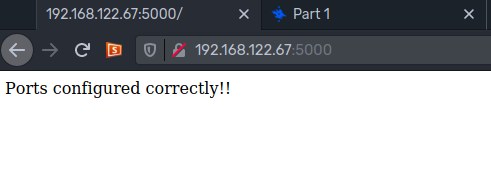
Exercise 1.10
FROM ubuntu:16.04

RUN apt-get update && apt-get install -y curl
RUN curl -sL https://deb.nodesource.com/setup_10.x | bash
RUN apt-get install -y nodejs
RUN node -v && npm -v

EXPOSE 5000
WORKDIR /

ADD . .
RUN npm install

CMD npm start
Now running
docker build -t ex1_10 .
docker run --rm -p 5000:5000 ex1_10:latest
yields the following:
If found this more elegant version (not using ubuntu:16.04) online:
FROM node:10-alpine

USER node
EXPOSE 5000
WORKDIR /home/node
ENV NODE_ENV=production

ADD . .

RUN set -x \
  && npm install \
  && npm run build

ENTRYPOINT ["npm", "start"]
Exercise 1.11
Here, we need a slightly slimmer Dockerfile that exposes another port:
FROM node:10-alpine

USER node
EXPOSE 8000
WORKDIR /home/node
ENV NODE_ENV=production

ADD . .

RUN set -x && npm install

ENTRYPOINT ["npm", "start"]
# in .../ex1_11
docker build -t ex1_11 .
touch logs.txt
docker run -d --rm --name back -p 8000:8000 -v (pwd)/logs.txt:/home/node/logs.txt ex1_11:latestExercise 1.12
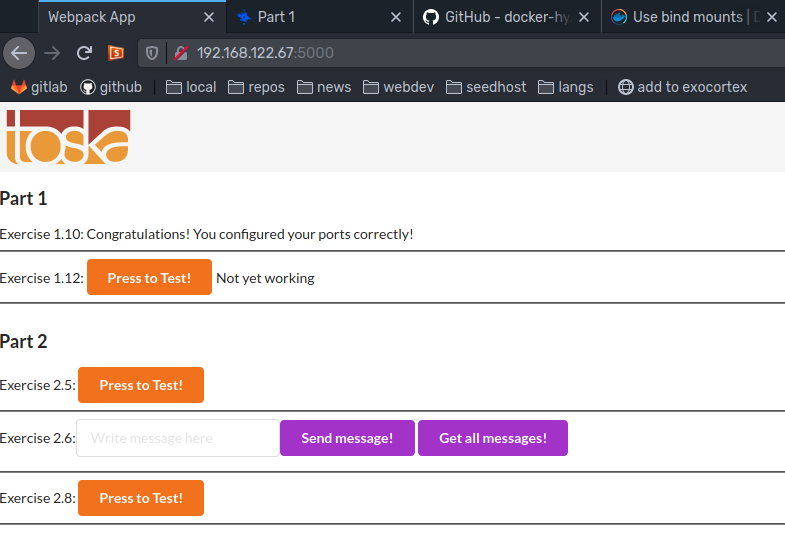
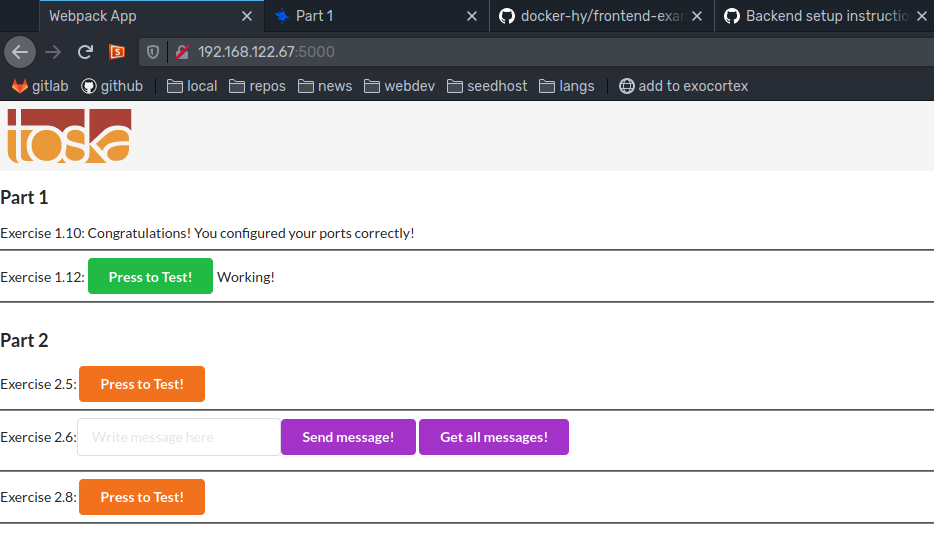
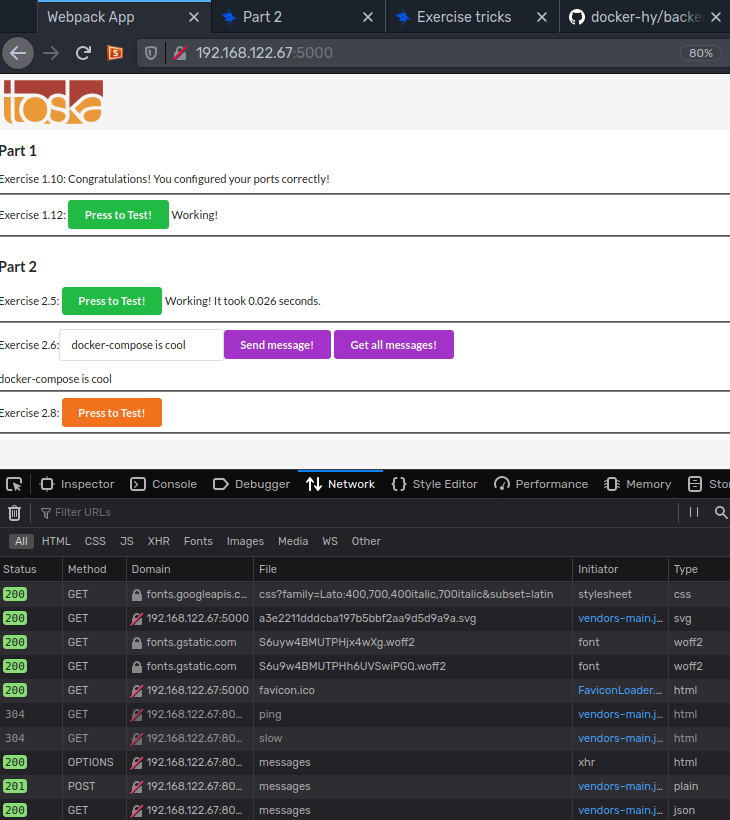
We can just use the Dockerfiles from the past two exercises and run these two commands:
# in .../ex1_11
docker run -d --rm --name back -p 8000:8000 -v (pwd)/logs.txt:/home/node/logs.txt -e FRONT_URL=http://192.168.122.67:5000 ex1_11:latest
docker run -d --rm --name front -p 5000:5000 -e API_URL=http://192.168.122.67:8000 ex1_10:latest
yielding a working front-end
Transclude of _20201112_182002screenshot.png"
Exercise 1.13
The Dockerfile looks as such
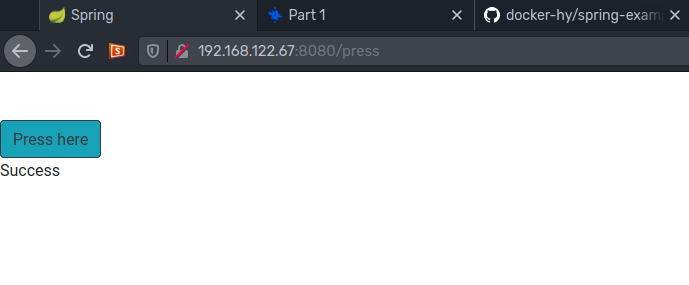
FROM openjdk:8

COPY . /usr/src/app
WORKDIR /usr/src/app
EXPOSE 8080

RUN ./mvnw package
CMD java -jar ./target/docker-example-1.1.3.jar
issuing the following commands then builds the image and runs the container
# in .../ex1_13
docker build -t ex1_13 .
docker run -d --rm --name java -p 8080:8080 ex1_13:latest
yielding the Spring application on port 8080.
Exercise 1.14
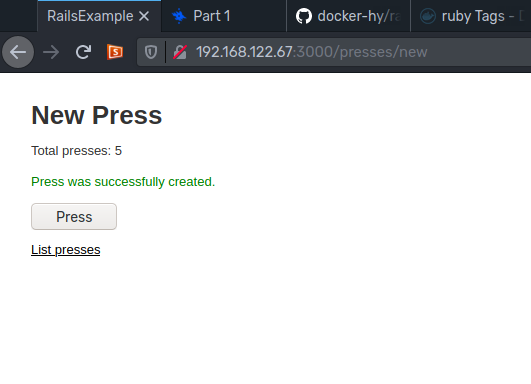
FROM ruby:2.6.0

EXPOSE 3000
WORKDIR /app

ADD . .
RUN set -x \
  && apt-get update \
  && apt-get install --yes nodejs \
  && apt-get clean \
  && bundle install \
  && rails db:migrate RAILS_ENV=development

CMD ["rails", "s"]
# in .../ex1_14
docker build -t ex1_14 .
docker run -d --rm --name ruby -p 3000:3000 ex1_14:latestyielding
Exercises 1.15-1.17
I did not do these, as they are related to publishing images to Dockerhub and
Heroku. Also, I want to get started with docker-compose. I did like the idea
of creating a docker container for my development environment (tools and
libraries). I added that to my roadmap for the future.
Other Key Takeaways
-
When commands depend on one another, it is best practice to run them together, like so:
RUN apt-get update && apt-get install -y wget -
There is an important difference between exposing and publishing a port:
- exposing a port. means that you tell Docker that the container listens
to a certain port. It is done by adding an
EXPOSE <port>line to your Dockerfile - publishing a port will map the container’s ports to host’s ports. In
order to publish a port you need to run the container with
-p <host-port>:<container-port>
- exposing a port. means that you tell Docker that the container listens
to a certain port. It is done by adding an
Part 2
Volumes in docker-compose
Exercise 2.1
version: "3.5"

services:
  first_pull_exercise:
    image: devopsdockeruh/first_volume_exercise
    build: .
    volumes:
      - ./logs.txt:/usr/app/logs.txt
this can then be started by:
# in .../ex2_1
touch logs.txt
docker-compose up
Web Services
We learn that we can give ports and environment variables to
docker-compose
version: "3.5"

services:
  backend:
    image: <username>/<image>
    ports:
      - 8000:8000
    environment:
      - VARIABLE=VALUE
      - VARIABLE
Exercise 2.2
easy…
version: "3.5"

services:
  ports_exercise:
    image: devopsdockeruh/ports_exercise
    ports:
      - 80:80
Exercise 2.3 & 2.5
This really shows the advantages of docker-compose over using the Docker CLI.
I also added redis which solves Exercise
2.5
version: "3.8"

services:
  backend:
    build:
      context: ../ex1_11
    volumes:
      - "./logs.txt:/app/logs.txt"
    ports:
      - "8000:8000"
    environment:
      - "FRONT_URL=http://192.168.122.67:5000"
      - "REDIS=redis"
    container_name: "backend"
    depends_on:
      - redis

  frontend:
    build:
      context: ../ex1_10
    ports:
      - "5000:5000"
    environment:
      - "API_URL=http://192.168.122.67:8000"
    container_name: "frontend"

  redis:
    image: redis
    container_name: "redis"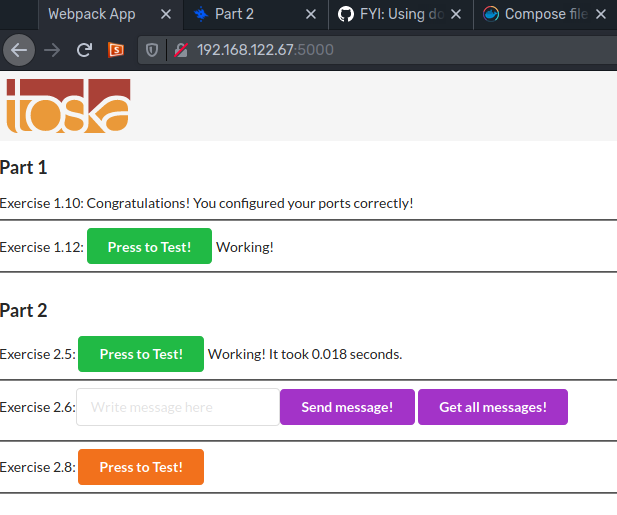
Scaling
- A really good summary of why you want to use reverse proxies with Docker specifically
- Jason Wilder, the guy who wrote the article above also built
nginx-proxy(repo), a neat little container that configuresnginxfor us from the docker daemon as containers are started and stopped. - Another useful resource is https://colasloth.com - a DNS “hack” which “simply resolves to 127.0.0.1, i.e. localhost, instead of pointing to the address of a specific machine. All subdomains under the domain also resolve to localhost, which can be useful in many situations”. I guess you can easily do that yourself with an unused domain.
All of the above is encapsulated in this simple whoami single-server hosting
configuration:
version: "3.5"

services:
  whoami:
    image: jwilder/whoami
    environment:
      - VIRTUAL_HOST=whoami.colasloth.com
  proxy:
    image: jwilder/nginx-proxy
    volumes:
      - /var/run/docker.sock:/tmp/docker.sock:ro
    ports:
      - 80:80
  hello:
    image: nginx
    volumes:
      - ./hello.html:/usr/share/nginx/html/index.html:ro
    environment:
      - VIRTUAL_HOST=hello.colasloth.com
  world:
    image: nginx
    volumes:
      - ./world.html:/usr/share/nginx/html/index.html:ro
    environment:
      - VIRTUAL_HOST=world.colasloth.com
Exercise 2.4
The command is fairly simple. On my configuration 5 instances of computer was enough:
docker-compose up -d --scale compute=5However, I could not access compute.localtest.me:3000 from my host machine
running Fedora due to CORS. I probably would have to edit my hosts file to
make it work. I was not inclined to do so, so I just installed xfce in my
Debian VM, openend Gnome Boxes and browsed to local.test.me:3000:

Networking & More Complex Applications
Let’s setup Redmine along with Adminer on the basis of a PostgreSQL database.
version: "3.5"

services:
  db:
    image: postgres
    restart: unless-stopped
    environment:
      POSTGRES_PASSWORD: example
    container_name: db_redmine
    volumes:
      - database:/var/lib/postgresql/data
  redmine:
    image: redmine
    environment:
      - REDMINE_DB_POSTGRES=db
      - REDMINE_DB_PASSWORD=example
    ports:
      - "9999:3000"
    volumes:
      - files:/usr/src/redmine/files
    depends_on:
      - db
  adminer:
    image: adminer
    restart: always
    environment:
      - ADMINER_DESIGN=galkaev
    ports:
      - 8083:8080

volumes:
  database:
  files:
NB We are letting Docker manage our volumes for us here. The docs of the PostgreSQL image do a good job of explaining what that means
Exercise 2.6
The following docker-compose.yaml does the job.
version: "3.8"
services:
backend:
build:
context: ../ex1_11
volumes:
- "./logs.txt:/home/node/logs.txt"
ports:
- "8000:8000"
environment:
- "FRONT_URL=http://192.168.122.67:5000"
- "REDIS=redis"
- "DB_USERNAME=postgres"
- "DB_PASSWORD=example"
- "DB_HOST=postgres"
container_name: "backend"
depends_on:
- redis
- postgres
frontend:
build:
context: ../ex1_10
ports:
- "5000:5000"
environment:
- "API_URL=http://192.168.122.67:8000"
container_name: "frontend"
redis:
image: redis
container_name: "redis"
postgres:
image: postgres
restart: unless-stopped
environment:
POSTGRES_PASSWORD: example
container_name: "postgres"
volumes:
- database:/var/lib/postgresql/data
volumes:
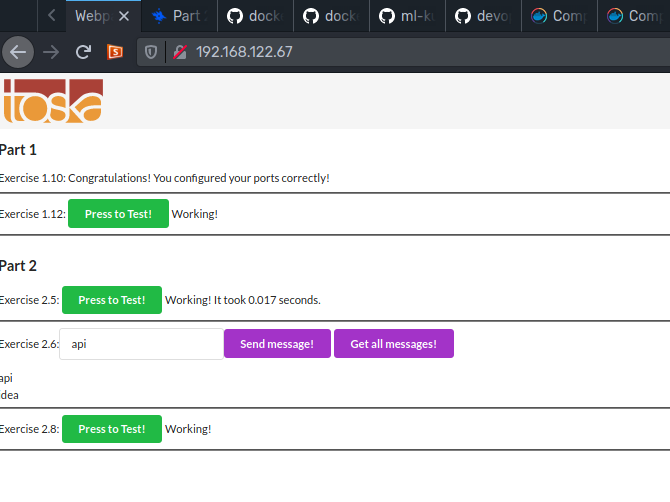
database:yielding a frontend with a working database connection as the developer console shows
Exercise 2.7
This was an interesting one:
version: "3.8"
services:
frontend:
build:
context: https://github.com/docker-hy/ml-kurkkumopo-frontend.git
ports:
- "3000:3000"
backend:
build:
context: https://github.com/docker-hy/ml-kurkkumopo-backend.git
ports:
- "5000:5000"
volumes:
- model:/src/model
depends_on:
- training
training:
build:
context: https://github.com/docker-hy/ml-kurkkumopo-training.git
volumes:
- imgs:/src/imgs
- data:/src/data
- model:/src/model
volumes:
imgs:
data:
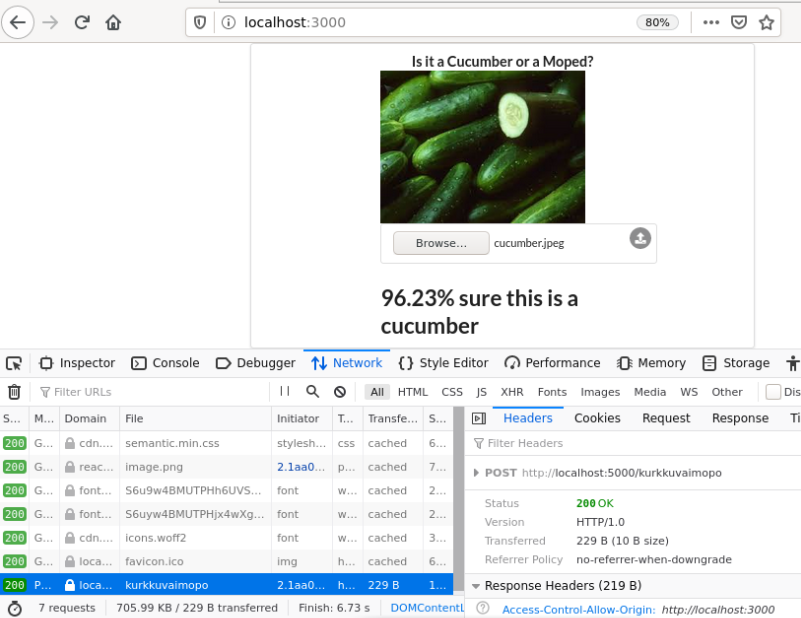
model:Again, the communication between backend and frontend does not work if I access the frontend from outside my Debian VM. Inside the VM, however, it works flawlessly:
Exercise 2.8, 2.9 and 2.10
Finally we’re adding a reverse proxy to our front- and backend containers from above:
events { worker_connections 1024; }

  http {
    server {
      listen 80;

      location / {
        proxy_pass http://frontend:5000;
      }

      location /api/ {
        proxy_pass http://backend:8000/;
      }
    }
}version: "3"
services:
nginx-proxy:
image: jwilder/nginx-proxy
container_name: "reverse_proxy"
volumes:
- /var/run/docker.sock:/tmp/docker.sock:ro
- ./nginx.conf:/etc/nginx/nginx.conf
ports:
- 80:80
depends_on:
- frontend
backend:
build:
context: ../ex1_11
container_name: "backend"
volumes:
- "./logs.txt:/home/node/logs.txt"
environment:
- "REDIS=redis"
- "DB_USERNAME=postgres"
- "DB_PASSWORD=example"
- "DB_HOST=postgres"
depends_on:
- redis
- postgres
frontend:
build:
context: ../ex1_10
container_name: "frontend"
environment:
# CORS Note
# to make it work outside my Debian VM
- API_URL=http://192.168.122.67/api
# to make it work inside
# - API_URL=http://localhost/api
depends_on:
- backend
redis:
container_name: "cache"
image: redis:alpine
postgres:
image: postgres
restart: unless-stopped
environment:
POSTGRES_PASSWORD: example
container_name: "db"
volumes:
- database:/var/lib/postgresql/data
volumes:
database:yielding an all-around working application that is accessible simply by
navigating to http://localhost (inside the VM) or http://192.168.122.67
(outside the VM)
All that I needed to change for exercise 2.9 was to delete the volumes at the
end of the docker-compose file and change the postgres service configuration
to the following:
# ...
# ...
# ...
postgres:
  # ...
  # ...
  volumes:
    - ./database:/var/lib/postgresql/data
Regarding Exercise 2.10: All buttons worked for me as shown above.
Part 3
-
CircleCI is a cool tool after you understand what it is doing for you. Every
git pushtriggers a new build of your containers (and possibly an update of the contained images if using watchtower) and deploys them to Docker Hub. Cool! -
I skipped the exercises until Exercise 3.2 as I did not feel like deploying something on Heroku and it seems fairly obvious how to get it working.
-
If you need tools for the build but not for the execution, do a so-called multi-stage build
Exercise 3.3
So I’m going with a simply bash script here that takes an argument, namely the name of the github repository to clone, to then build the image based the Dockerfile contained within that repository. Finally, it tags and pushes the image to Docker Hub.
#!/bin/bash

if [ -z "$1" ] ; then
   echo "Usage: $0 username/repo"
   exit 1
fi

#  image name
NAME=$(echo "$1" | awk -F/ '{print $NF}' | awk -F. '{print $1}')
NAME="linozen/${NAME}"

#  show tagging action
echo "URL ${1} will be tagged as linozen/${name}"

# the directory of the script
DIR="$( cd "$( dirname "${BASH_SOURCE[0]}" )" && pwd )"

# the temp directory used, within $DIR
# omit the -p parameter to create a temporal directory in the default location
WORK_DIR=`mktemp -d -p "$DIR"`

# check if tmp dir was created
if [[ ! "$WORK_DIR" || ! -d "$WORK_DIR" ]]; then
  echo "Could not create temp dir"
  exit 1
fi

# deletes the temp directory
function cleanup {
  rm -rf "$WORK_DIR"
  echo "Deleted temp working directory $WORK_DIR"
}

# register the cleanup function to be called on the EXIT signal
trap cleanup EXIT

# clone
git clone "https://github.com/${1}.git" ${WORK_DIR}/git/

# change into the dir
cd ${WORK_DIR}/git

# build
docker build -t ${NAME} .

# push
docker push ${NAME}
Basically the same stuff I did as in my Debian VM to get Docker runnning
FROM debian:buster

WORKDIR /app

# Install dependencies
RUN apt-get update && apt-get install -y git-core

# Install Docker
#  https://docs.docker.com/engine/install/debian/
#
RUN apt-get install -y \
    apt-transport-https \
    ca-certificates \
    curl \
    gnupg-agent \
    software-properties-common
RUN curl -fsSL https://download.docker.com/linux/debian/gpg | apt-key add -
RUN add-apt-repository \
   "deb [arch=amd64] https://download.docker.com/linux/debian \
   $(lsb_release -cs) \
   stable"
RUN apt-get update && apt-get install -y docker-ce docker-ce-cli containerd.io && apt-get clean

# Copy our script
COPY snatch-n-build.sh /app/snatch-n-build.sh

# Make it available
ENV PATH /app:$PATH

# Setup a default command
ENTRYPOINT ["/app/snatch-n-build.sh"]
Then, we run the following:
# in .../ex3_3
docker build -t snatch-n-build .
# now we connect to docker daemon of the host and provide the necessary credentials
docker run -ti -v /var/run/docker.sock:/var/run/docker.sock \
               -v /home/lino/.docker/config.json:/root/.docker/config.json \
               snatch-n-build:latest docker-hy/docs-exercise
Exercise 3.4, 3.5 & 3.7
- Regarding 3.4 and 3.5, I have already done both of these things at earlier stages.
- An example of a multi-stage (node) build using the node modules can be found here. I leave it to my future self to figure it out again:
FROM node:alpine as builder

## Install build toolchain, install node deps and compile native add-ons
RUN apk add --no-cache python make g++
RUN npm install [ your npm dependencies here ]

FROM node:alpine as app

## Copy built node modules and binaries without including the toolchain
COPY --from=builder node_modules .
Podman as an alternative
Podman seems to solve some of Docker’s inherent problems (big fat and often rootful daemons, difficult to inspect images berfore pulling them etc.) and is reasonable compatible with Docker.
- There is a really good presentation by Dan Walsh on Podman’s features (and Docker’s shortcomings)
- Here is a blog post on
the alternative for
docker-composewhen using Podman- also review examples in podman-compose, as the project is maturing every day